Large based therapy ball controller allows user to access and control computer using keystrokes. The user is able to control the ball switch with or without physical assistance dependent on their individual needs.
|
Makey Makey as Assistive Tech |
|
 Areas Addressed: Therapeutic Benefits:
Intended Population:
|
|
|
|
Step One: Prep Materials |
|
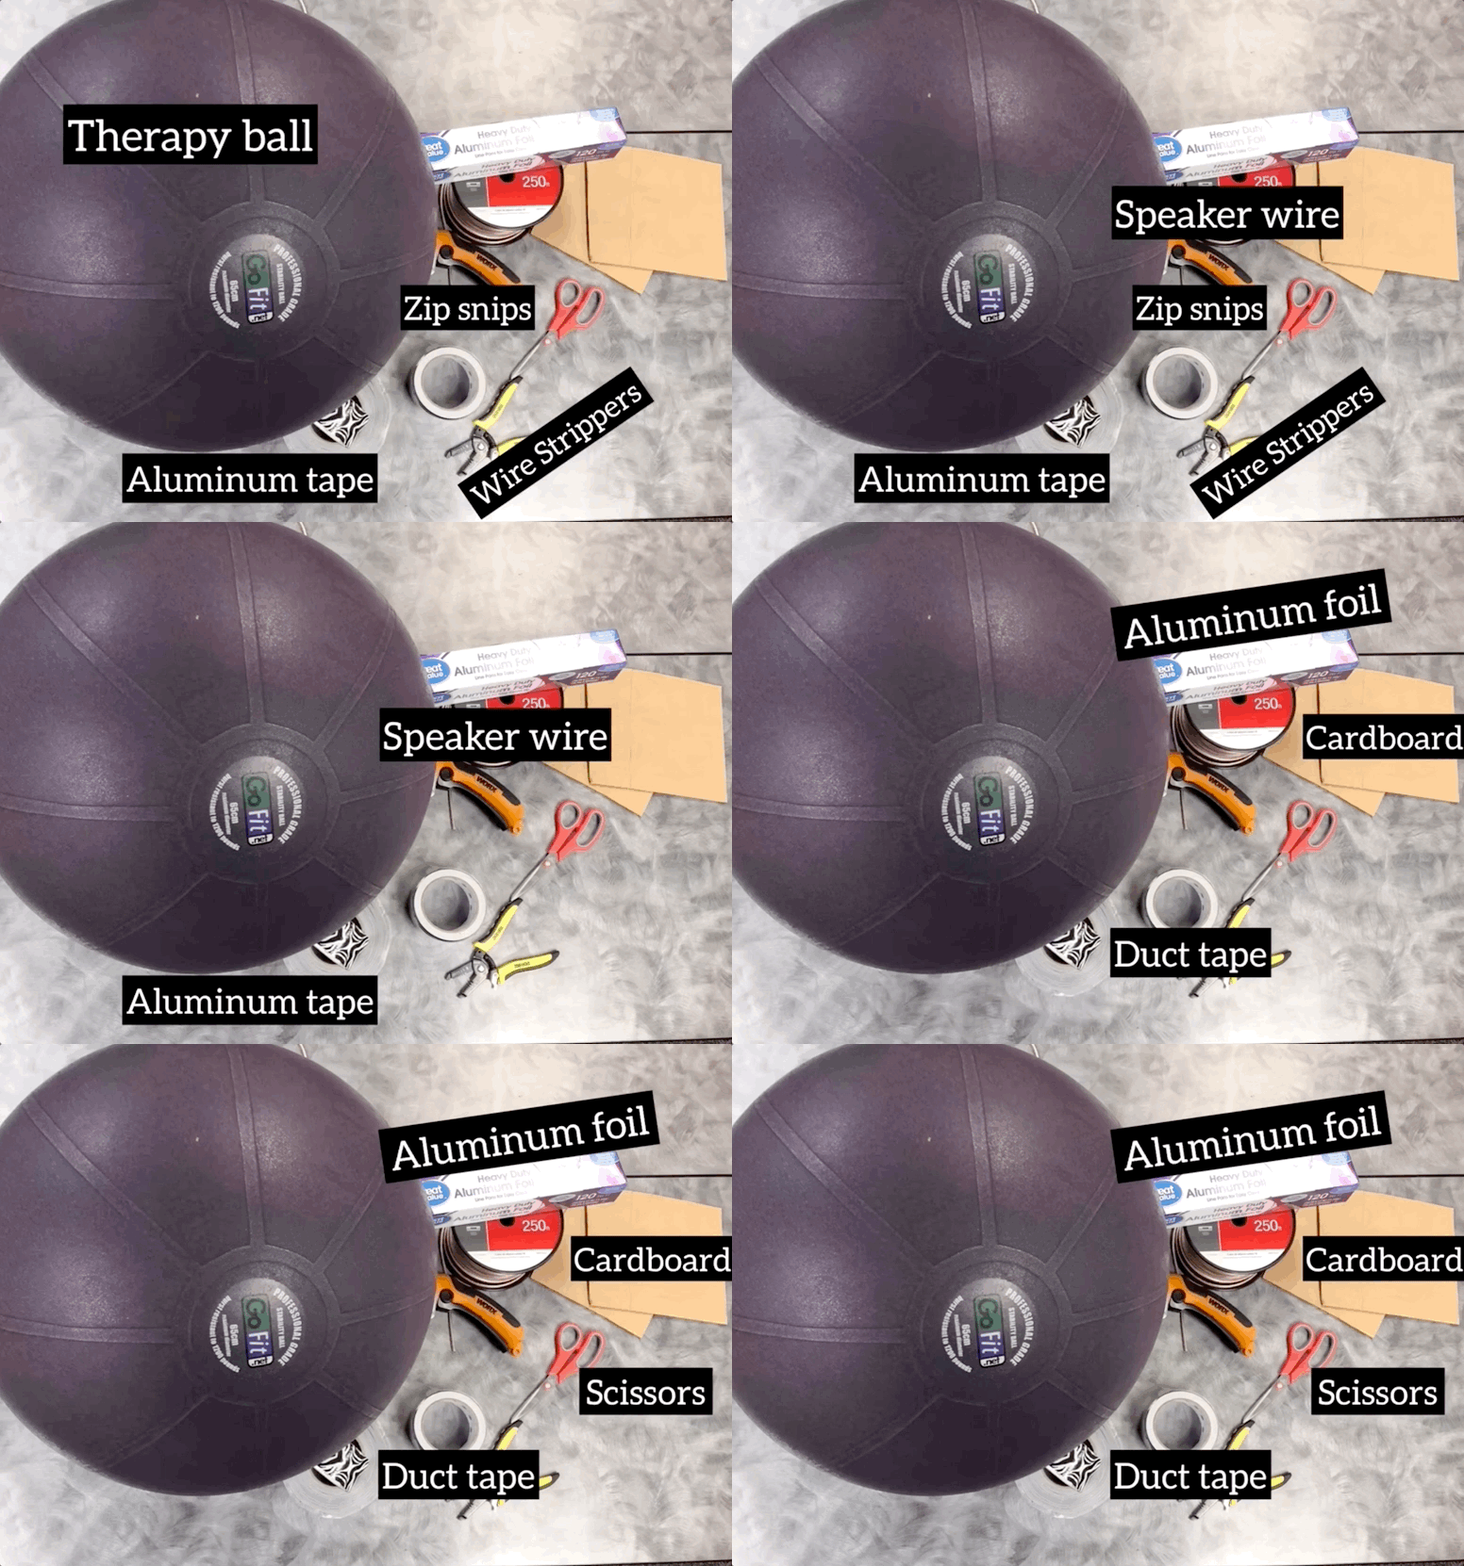
Begin by measuring and cutting one long piece of speaker wire, the desired length is dependent on the size of the exercise ball and desired distance to allow for plugging the controller into the Makey Makey and computer. This piece of speaker wire will be directly connected to the therapy/exercise ball. Using the wire strippers, strip the ends of each end of speaker wire exposing at least 1” of the wire. Pull wire apart approximately ¼-½ way down the length of the wire creating 2 single wires (Y shape). Cut one additional piece of speaker wire at least 12 inches in length. Using the wire strippers, strip the ends of this piece of speaker wire exposing at least 1” of the wire on each end. Pull wire apart the full length creating two single wires. These pieces of speaker wire will be directly connected to the aluminum floor targets that will be placed on the ground. Cut four small pieces of aluminum tape ~3-5 inches in length dependent on size of exercise ball. Cut two pieces of cardboard to form your targets which will act as your key strokes. The size of cardboard will be dependent on the desired range in which your user should have to shift/tilt to access. For example, if the individual user is more limited a larger target would be more appropriate. We suggest the target being at least 4 in X 4 in. (You can even vary the sizes as the user needs gains success with the target level.) Note: You can create additional aluminum targets and touch points that can act as additional keys (i.e 4 touch pads that correspond to: Up, Down, Left and Right arrow keys). Doing this requires preparing necessary materials for the given number of targets in which you desire. |
|
Step Two: The Build |
|
Now it is time to build and assemble your ball controller! Building the Ball: Begin by taking one piece of the prepared aluminum tape and place on either side of the therapy ball near the bottom of your ball. Note: You will have an aluminum touch point on both sides of the ball. Repeat the same using a second piece of the prepared aluminum tape to the bottom of the ball on the opposing side.Now taking one end of the prepared speaker wire for the ball, place one end of the exposed wire on top of either of the aluminum touch points. Taking another small piece of aluminum tape, tape down the exposed speaker wire directly on top of the touch point. (Taking care that the exposed wire has direct contact with the aluminum tape.) Repeat steps 2-3 on the other aluminum touch point. Doing this will allow the electrical current to pass through. Using duct tape, apply strips to outline the aluminum touch points on both sides of the ball to help with maintaining secure hold of the wires. Building the Aluminum Floor Targets:
Take one of the pieces of speaker wire you have prepared for the aluminum floor targets, and place one end of the exposed wire on top of the aluminum foil. Tape the wire down using Duct tape while making sure the wire has direct contact with the foil.
|
|
Step Three: Hook to Makey Makey |
|
Now it is time to put your finished ball switch to the test! Begin by plugging the USB cable into your Makey Makey and hooking it to your computer. Now using the open wire with exposed speaker wire that is attached directly to the therapy ball: Hook the wire to an alligator clip. You can twist the speaker wire to the clip to ensure a secure attachment. Hook the opposite end of the alligator clip to its corresponding area to the ‘EARTH’ on the Makey Makey. Position each aluminum foil target on the floor at the desired end range allowing for direct contact with the aluminum touch point on the ball. Taking each aluminum foil target, use the open wire with exposed speaker wire and hook each wire to an alligator clip. You can twist the speaker wire to the clip to ensure a secure attachment. Hook each wire to its corresponding area on the Makey Makey circuit board (i.e one to the left direction key and one to the right directional key).
|
|
|
|
Step Four : Play, Share, or Extensions |
|
Now it is time to get playing! The Balance/Weight Shift Ball Controller can be paired with any game/app with directional keys or 2 different keys (i.e space/click). Here are a few of our favorites: |
|
|
Supplies
- Makey Makey Classic
- Therapy/Exercise Ball
- Aluminum Tape
- Speaker Wire
- Electrical Tape
- Wire Strippers
- Duct Tape
- Aluminum Foil
- Additional Supplies Needed: Cardboard, Scissors or Cutting Tool


 Check out the full live workshop here: