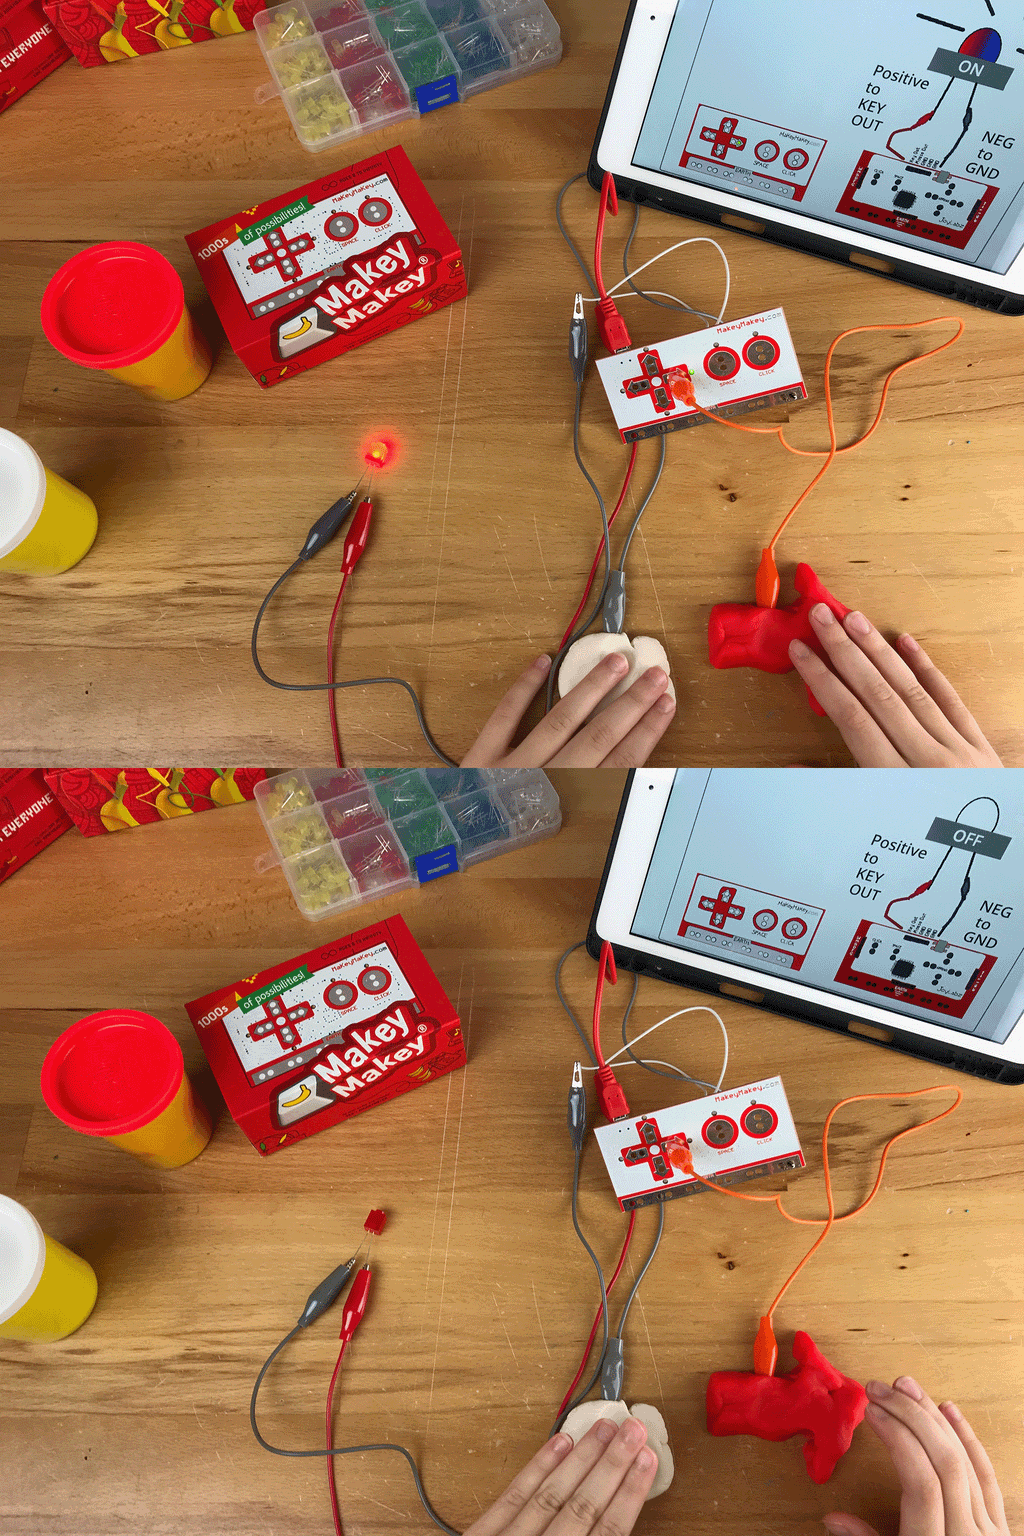
Check out this quick guide to learn how to light an LED with Makey Makey!
| Welcome to this micro-guide |
|
Here's a quick micro-guide for lighting LEDS with your Makey Makey invention kit! For this project you'll need some 3mm or 5mm LEDS, Play-doh, and some regular aluminum foil from your kitchen! You'll learn to use the "KEY OUT" pin on the back of your Makey Makey, tinker with making Play-doh switches, and craft your own paper circuit. |
| Light an LED |
|
You can easily light an LED with a 3V coin-cell battery, but it's pretty cool to learn how to light an LED with Makey Makey. It will encourage you to find interesting ways to build switches that will light up your inventions. Need to check the polarity of your LED? Here are 5 simple way to determine your LED polarity from maker Nikodem Bartnik!
Light an LED with Makey MakeyNow that you've determined polarity, let's hook up the LED to your Makey Makey invention kit! First, turn over your Makey Makey and look for the top header on the back of the board. Instead of an alligator clip, you access these pins with hook up or jumper wires. Place a jumper wire (the small white wire in your kit) into the "KEYOUT" pin. You can then clip an alligator clip to the other end of this wire and clip it to the long leg of your LED which will be the positive leg. We used the red alligator clip for our positive connection. To ground your LED, clip one alligator clip to EARTH (or use a jumper wire in a GND pin) and clip the other end to the short leg of your LED. We used a gray alligator clip for our negative connection and a red alligator clip for our positive connection. That's it! To light your LED, hold EARTH and press any key press to light up your LED. Ohm ResistorsYou will need an ohm resistor in your Makey Makey circuit so you don't blow out the LED. To figure out what ohm resistor you need, you have to use Ohm’s Law. That formula is V = I × R, where V is the voltage, I is the current, and R is the resistance. Check out this table from Evil Mad Scientist. Makey Makey output is between 4.5 - 5V, so for a Blue, Green, White, or UV LED, you will want to use a 48 ohm resistor. If you are using a Red, Yellow, or Yellow-Green LED, you will want a 36 Ohm resistor.
Long Leg of LED - KEY OUT pin Short leg of LED - GND pin or EARTH input Video of Lighting LED and Adding Scratch CodingNeed Supplies? Hack a Tea Light!Maybe you don't have access to an LED and a coin cell battery? You never know, you might have these exact items in something at home! Do you have any thing small that lights up? You might have one of these dollar store tea lights you can use to craft a simple circuit. Here is a quick walk through in hacking a tea light to make a paper circuit. (Video includes how to draw out your circuit if you don't have access to a printer.)
|
| Make a Switch |
|
Did you know you can craft circuits and switches with stuff from around your house? Let's try out different materials to see what can be used as an inventive switch. You can even create your own scrappy circuits with office supplies. Virtual Makey Makey LED Tester on Scratch You can use or remix this Scratch project to test how any key press will make an LED light up with Makey Makey.
Playdoh Momentary Switch Squishy Play-doh or modeling clay can be a really quick and squishy switch! Hook one alligator clip from any key press to one piece of Play-doh and hook another alligator clip from EARTH to a separate piece of Play-doh. Touch both pieces of Play-doh to light your LED!
Maintained Binder Clip Switch Clip two binder clips to cardboard. When the two clips touch, your LED will light. This switch is more like a light switch, you can leave the LED on or off. If want more ideas on making your own switches, check out this whole class on crafting and designing switches.
Check out this video for more ideas on your Play Doh light switch! |
|
|
| Craft a Circuit on Paper |
|
If you haven't crafted a circuit on paper yet, you should try this out! All you need is some aluminum foil, an LED, and a 3V coin-cell battery to make this quick and simple paper circuit! PDF Template to Download:
If you don't have a battery, you can still create a paper circuit and wire it to Makey Makey kind of like you did in step one of this guide, but you'll attach your LED to paper! This video shows you both techniques: PDF Template for Makey Makey Simple Circuit

More Resources:Like this tutorial? Want to go more in depth? Check out these other resources for tinkering with LEDs, circuits, and more!
|
|
|
Supplies
- Makey Makey
- LEDs on Amazon / Adafruit LEDs/
- Ohm Resistors
- Aluminum Foil or Foil Sheets
- Play-doh
- Optional: SparkFun Hookup Wire


