


Hello Light! What is a Circuit?
Hello Light! What is a Circuit?
Learn how a simple circuit works so you can create your first circuit and light your first LED! You will learn how to craft a simple circuit, learn how Makey Makey works by completing a circuit, and learn how humans can connect to make a key press on your computer!
Introduction
Makey Makey works by completing a circuit. But, what is a circuit and how do you complete one?
A circuit is the basic building blocks of electronics and how we harness electricity to do work for us. In this activity you will build a circuit using an LED and a battery! Once you have harnessed the circuit the world will be your blink oyster!
What You Need to Know...
Crafting Skills
Coding Skills
Time Investment
Background Information
This activity is our starting point if you are new to creating and building circuits with Makey Makey! So, there is not much background information needed. But, if you are the type of person that really wants to dig in and learn more about the nitty gritty details of circuits and how they work, these other activitiess are right up your alley…
Getting Started with Makey Makey
Circuit Challenge!

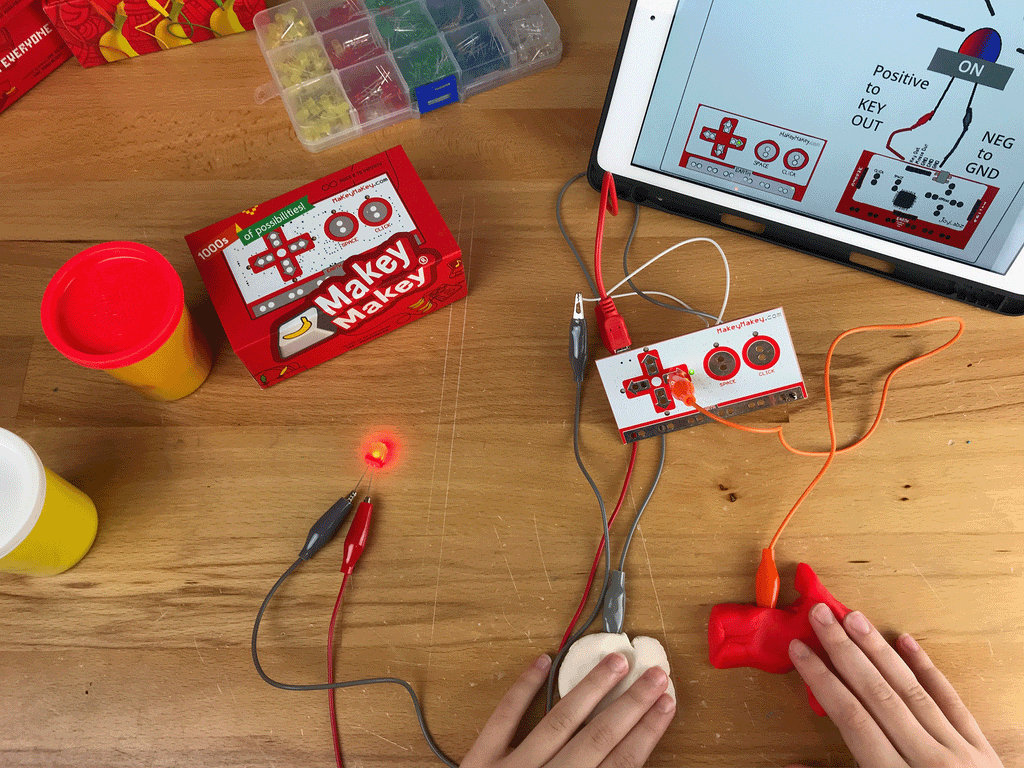
Take what you learned about a simple circuit and extend it by using a Makey Makey with your LED!
Is it Conductive?

Build a conductivity tester that uses Makey Makey to help you figure out what materials are conductive and which ones aren't!
Banana Piano!

Use bananas or any other produce to build circuits and turn them into piano keys using Makey Makey and our free Piano App!
Don’t worry, we will wait right here for you if you want to go and explore!
Tools and Materials
This activity is pretty straight forward, but it does require a few things that you may not have just laying around at home or on your desk at school. Here are the required tools and materials you need to be able to make this all work.

Tools
- Scissors - Used for cutting paper, tape and other things other than your fingers!
- Computer with Printer - To print a template for you to work with!
Materials
- Simple Circuit Template- Template for creating a paper circuit!
- Conductive Fabric Tape- Fabric tape that conducts electricty
- Coin Cell Battery (CR2032) - Battery used to power our circuit
- 5mm Red LED- The LED that we will light up!
- Scotch Tape (Optional)- Used to tape down the LED!
Need Supplies? No LED? Hack a Tea Light!
Maybe you want to draw on cardboard instead, or use this idea with paints? All awesome ideas and we totally want you to play with the materials you have on hand.
Maybe you don't have access to an LED and/or a coin cell battery? Well, you might have these exact items in something at home in the form of one of those cheap LED tealights you can find at the grocery or home goods store! Usually you can find one laying and not being used. Ripe to be taken apart are repurposed!
Do you have anything small that lights up? You might have one of these dollar store tea lights you can use to craft a simple circuit. Here is a quick walk through in hacking a tea light to make a paper circuit. (Video includes how to draw out your circuit if you don't have access to a printer.)
The MOST Simple Circuit
First and foremost materials are conductive (conductor) or not (insulator). A conductor is a material that allows the flow of electrons through it easier. There is a range of how conductive something is, but that is for a different time! For now, just know that some materials can allow electricity to pass through it and others cannot.

A circuit is us creating paths or roads that are conductive that lead electricity along those roads to different locations and to do different tasks for us. The most simple circuit flows in a loop and can be done with just an LED and a battery as shown above. The electrons flow from the positive side of the battery, up through the LED lighting it up- and back down to the negative side of the battery completing the loop and closing the circuit.
If your LED doesn’t light up, no worries! You probably have it backwards. LEDs are special light bulbs that only let electrons flow through them in one direction, like a one way street! This is called polarity; something that will only work in one orientation. If the LED is backwards the electrons cannot pass through it, therefore not completing the circuit and not lighting up!
Checking an LEDs Polarity
There are a few ways that you can check an LED for its polarity. The easiest is to look at the length of its legs!

When you look at the two legs of an LED you will notice that one is longer than the other. They are supposed to be that way! The long leg is usually positive and the short leg is negative.
In technical terms the long leg (positive) is called the anode and the long leg (negative) is called the cathode. We try to keep things simple, but thought you may want to know! But, what if your LED legs are all bent up or trimmed down so that you cannot tell their length?

Not a problem, the bulb will tell you! Yep, that is correct the bulb itself has a marking (a flat spot on its rim) that is aligned with the negative leg of the LED. So, no matter how messed up the legs of your LED get, you can know which one is positive!
Information!
Need to cut to the chase? Here are 5 fun way to determine your LED polarity from maker Nikodem Bartnik!
Let's Craft a Circuit!
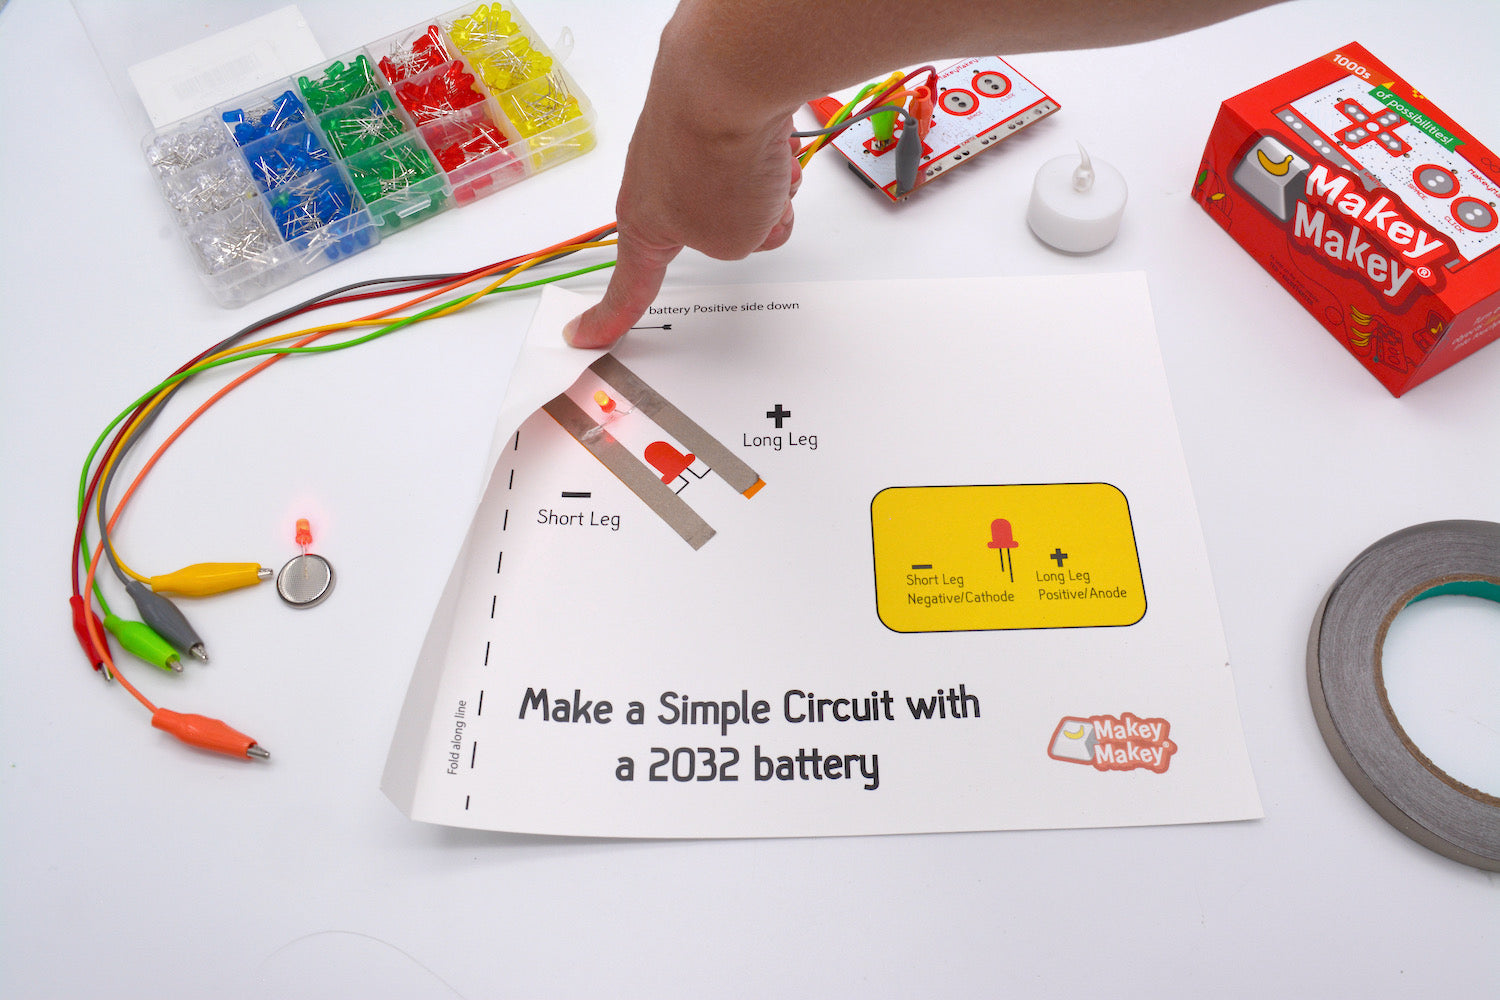
So, you have built the most simple circuit, but now it is time to take it to the next level and put some distance between the battery and the LED. by building a paper circuit. This quick activity will walk you through crafting your first.
In the engineering world, we like to type "Hello World!!” as our first line of code. It’s a good way to imagine it is that you are taking the pulse of your project to make sure it is alive and well. With paper circuits, we say "Hello Light!" as that is the simplest thing that a paper circuit does… light up a light! We will first need to print out a template on a piece of paper. You can download the template here or follow the link in the Tools and Materials section.

The template is going to act as our road map for building our first circuit. As long as we follow the map we will be successful! Here are the instructions, step-by-step for you!
-
Place the conductive fabric tape on the template where it is marked in the wide orange lines.

You can use your scissors to cut the tape to length or if you are using copper tape, tear it.
-
Bend the legs of your LED and place the longer leg (the positive leg) on the positive copper tape trace.

Place the shorter leg on the negative tape trace. Pro Tip: You may also want to put a few bends in each leg to give it more surface area and stability to keep it from moving around.
-
Use regular tape or more copper tape to hold the legs to the traces.

Make sure that the positive trace and the negative trace never touch.
-
Place the battery positive side down (Note that the coin cell battery has a plus(+) on its positive side) on the template and fold the paper as indicated so the electrons can flow in a loop!

If you were successful in building your circuit correctly your LED should light up when you fold the corner of the template up and around the battery and press it down!
Yes! Win! You have successfully constructed your first circuit. You now have “the circuit” in your tool belt for the future. Your understanding of a circuit is foundational in your use and success with Makey Makey, so be sure that you get everything working here. If for some reason your LED did not light up, check out the Troubleshooting section below to see what’s up.
Troubleshooting
It is important to note that electrons are lazy and if they find an easier way to close the loop, you will short your circuit and your LED won't light up! So this means if you are having trouble lighting an LED with this simple circuit template, you should check:
- Does the positive circuit trace (conductive tape) ever come in contact with the negative circuit trace? - Make sure to leave a gap under your LED.
- Do the circuit traces (your conductive tape) accidentally touch where you've made your battery connections? - Double check and make sure there isn't a short circuit!
- Is your LED connected correctly? - Try flipping it around or checking the polarity with the coin cell battery.
- Is your battery dead? - This happens! Make sure your LED lights up with just the battery itself before adding the battery to the circuit.
Going to the Next Level!
Armed with this basic paper circuit experience you can build on it and use it to create some other fun projects. Off the cuff, you can take the materials you do have and try to create a new circuit of a different shape on a different surface. Try putting it on the wall, a table or a door! Just make sure that surface is NOT conductive!
If you are looking for other activities to do with creative circuits and even with Makey Makey and other materials check out the following…
- Blackout Poetry - Creating Black Out poetry with Scratch and Makey makey!
- Crafting and Designing Switches - Create different types of switches using craft materials other than just folding the corner of your page over!
- Lighting an LED with Makey makey - Take what you have learned with your basic LED circuit and have your Makey Makey do all the work for you!
Once you've crafted a circuit, it's time to take your newly found super power and tackle some other challenges that use the Makey Makey. For starters check out these other lessons and projects.
Craft and Code Projects
DIY Controller

Build your own game tilt based controller with Makey Makey and a yogurt cup. Test it out with our Etch-a-Sketch App!
Drawable Circuits
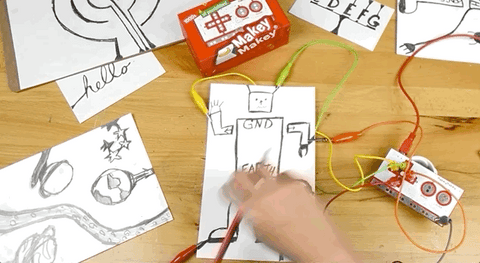
Draw your own playable instrument, connect Makey Makey to your drawings, and jam out with this Activity.
Interactive Art
We take the popular nail and thread art to the next level to make it interactive using the Makey Makey!