


This large scale (see what we did there?) piano takes about one hour to set up. It works great on our new piano app, Eric's MK1 Sampling Keyboard for Makey Makey or this Scratch game we made.
| Create a Background |
|
Create a background for your large scale floor piano with a large piece of cardboard and butcher paper. This will make your whole set up transportable! If you want to roll up your piano, just make this whole build on a yoga mat! |
|
|

| Create Piano Keys |
|
Grab a roll of kitchen foil to make piano keys. We pulled out about 24" and then cut that piece in half to make each key for our scale. Space each foil out on your background before attaching to make sure you have good spacing!
Check to make sure none of your foil keys are touching each other, then use a glue stick to adhere each key to your background. Wrap each key press around to the back side of your backdrop.
Attach a wire to each key press at the top edge of the cardboard. Use a small white hook up wire from your Makey Makey kit for each key press. Use some conductive fabric tape or copper tape to attach the metal part of the wire to the aluminum foil key press. (Note: You cannot use the HVAC tape for this as the conductive is not adhesive. So make sure the conductive tape you use also has conductive adhesive. This will ensure a good connection.)
Create an EARTH strip with HVAC tape or conductive fabric tape. Each key press will be activated when a socked foot (or barefoot) steps on the earth strip and the key. So make sure your EARTH is close to each key, but not touching. To keep our wires safe, we ran the EARTH strip underneath the key presses, then folded the corner at the end and ran EARTH to the top of our backdrop. You can elbow patch two pieces of HVAC tape together with conductive fabric tape to make your EARTH strip wider if needed. NOTE: HVAC tape is sharp on the edges! Make sure to smooth it down or cover the edges of the tape with Duct tape. |
|
|


| Hooking up Makey Makey to the Full Scale |
|
Insulate each key press with duct tape and hook up a keyboard to start playing with your feet! Your foot will touch the EARTH connection and a key press, therefore closing the circuit!
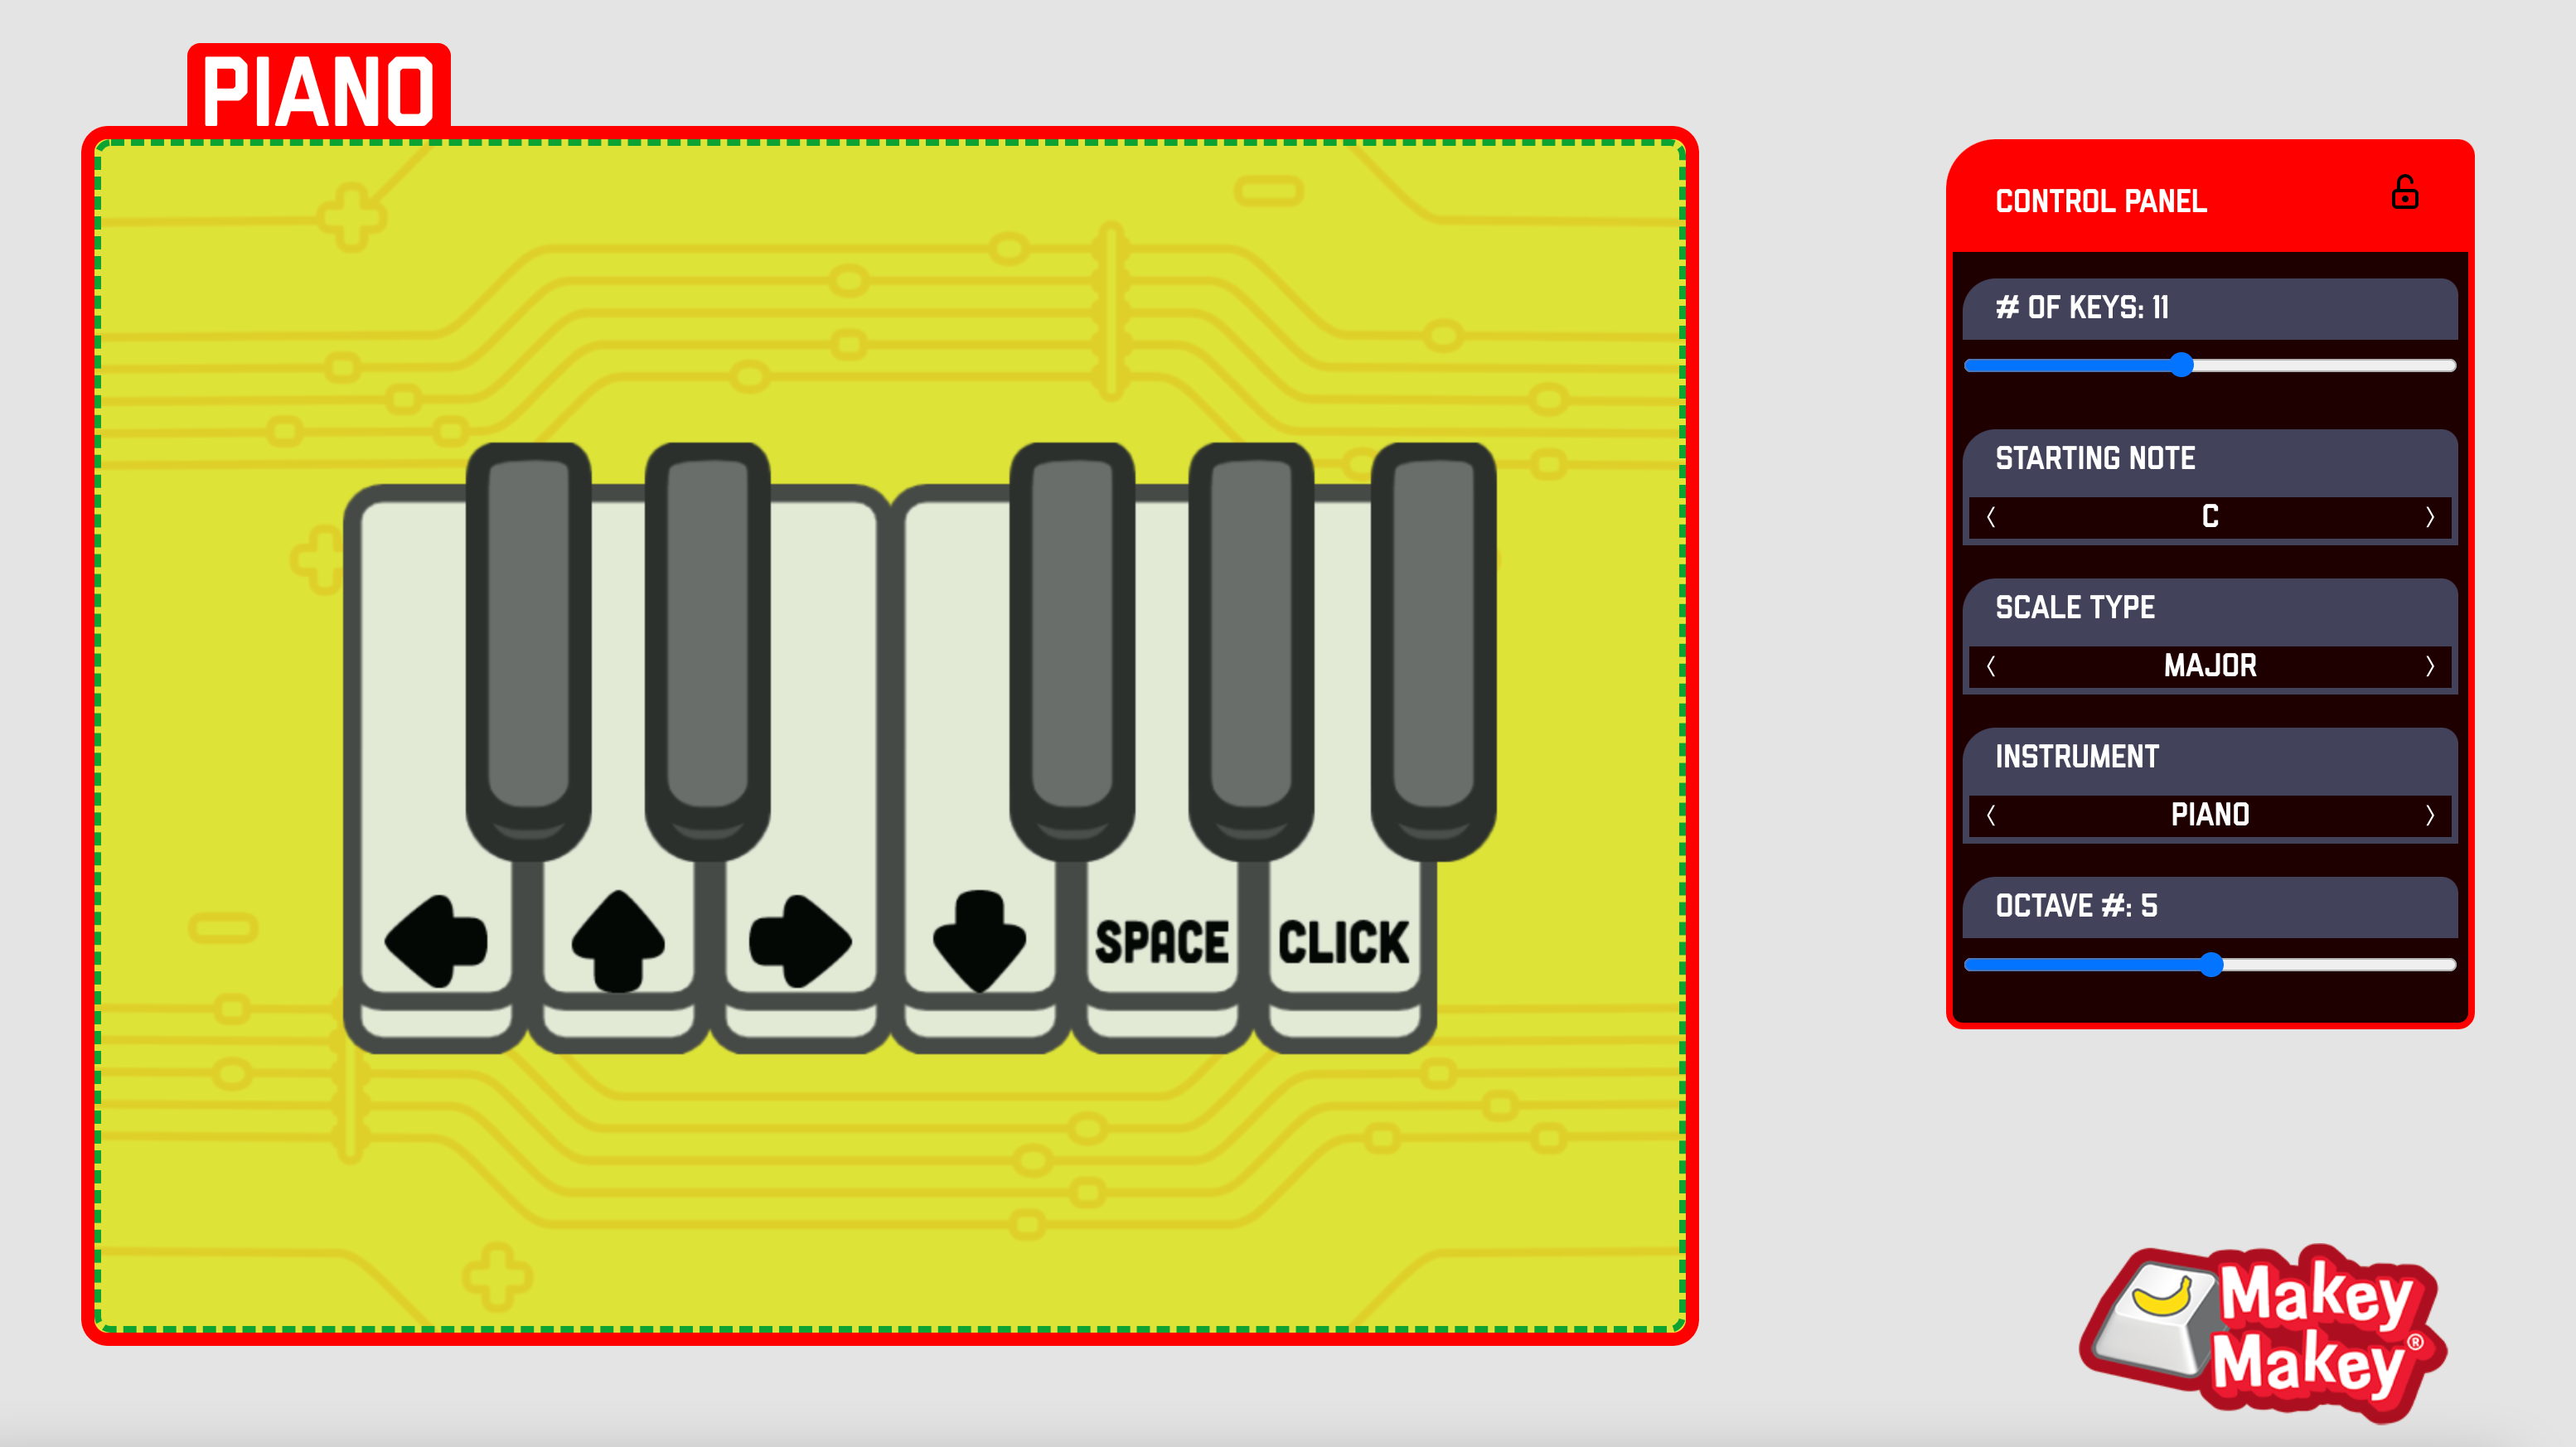
New Adjustable Piano AppThe new Makey Makey Piano App is the culmination of years of learning and play at JoyLabz. We took our tried-and-true piano app that was created when Makey Makey was first introduced, and we took it up a level. The new Piano App has a number of cool features we think you'll like!
New Piano App Features
To use this app with your full scale piano, just click on the lock to unlock the Control Panel. Adjust the slider to the amount of keys you need and you can even choose what key presses by clicking on each key and assigning key presses. When you are done, click the lock to lock your adjustments.
Jam Out on the NEW Piano App!On the piano app, click on the lock in the control panel to make changes. Then change the amount of inputs to 18 and adjust the scale type to Chromatic. Now you can play 18 inputs with just one Makey Makey!
MK1 Sampling KeyboardTo hook this up to Eric's MK1 Sampling Keyboard for Makey Makey, follow the template below. Attach your STEM pack extra long alligator clips to the exposed end of your hook up wire and attach each key to Makey Makey.
|


| Wire Maintenance |
|
If you'd like to indulge in some serious wire maintenance so you can move or fix the piano as needed, that will add an hour to your build time. As you hook up your Makey Makey, label the key press on masking tape. To help you reconnect if you move this piano, label the key press near the piano key and add a second label near the Makey Makey.
To add keys W A S, you have to use the back of your Makey Makey. Use a hook up wire to plug into the back of your Makey Makey and label each hook up wire with the key it will connect to. This will help you connect the right keys!
Since you will alligator clip to this wire, you may also want to wrap the connection with electrical tape to make sure the wire stays connected to your alligator clip.
If you label your alligator clips clearly, you can also add some masking tape to hold the wires together in small batches. It can also help to tape the wires to the floor to keep them from getting unplugged. It's also good to put your Makey Makey in a case or up higher away from the floor! You don't want it to get accidentally stepped on! |


| Adding Sharps: The Template and Overview |
|
Here is an overview of the template for adding sharps to your piano. You'll have to remap a few keys to be letter presses on the back of your Makey Makey. To prepare follow this remap guide to make the mouse movements on the back right header into key presses. The first step is to insulate your previous piano keys. You'll use the black duct tape to insulate your previous keys and BONUS it will make your piano look even more like a piano!
To make the connections for your sharp/flat keys, you'll be making a different type of connection. We will run an EARTH strip to each key press. (This is actually how a circuit board is made for a keyboard! On a keyboard, when your finger presses a key, it makes a connection across two conductive traces. That sends a signal to the computer that you've pressed a key. You'll be doing the same thing with your feet for these piano keys! Check out this closeup of what the conductive traces look like for the flat key and what it looks like to insulate your previous circuits with duct tape.
We are using 1" conductive fabric tape for these key presses, if you one of our Booster Packs, there is a skinnier version of this tape in the kit. It has conductive adhesive, so it is good for making this more complicated circuit! Wire up all the keys and plug in the USB cable, now you are ready to Makey Makey! |
|
|


| How to Add Sharps |
|
First off, you need to run an EARTH strip along the top of your piano. Make sure you've insulated your previous circuits with duct tape. For each key press, you'll put down a conductive tape trace like in picture 1. Then using an extra long hook up wire, place conductive tape on top of the stripped wire to attach it on the top and the bottom to your key press tape trace as seen in picture 1. By sandwiching the wire you are ensuring connectivity. Especially since others will be stepping on these piano keys!
Cover your conductive tape and wiring on the top of your piano with black duct tape. This will insulate your circuit AND keep your wiring in place. Above, you can also see where the EARTH connection is visible. In the picture below, we have NOT connected the EARTH connection for this key press to work yet. Notice that the black duct tape insulates your flat/sharp key press from your previous circuits. Also notice that this EARTH will run across the top of your piano to your previous EARTH connection from your oversized piano. For each flat/sharp key press, you'll run a tape trace down from this EARTH tape trace so that when someone steps on top of both, their foot will complete the circuit.
Run your EARTH tape trace next to your key press. Make sure you connect to your EARTH strip on the top of your piano AND that this circuit trace runs parallel to your key press. Don't let these two conductive pathways cross or you will have a continuous circuit.
You've made a sharp key now! Use duct tape to insulate your earth connection as seen below. |
|
|


| Wiring and Insulating Sharps |
|
Repeat previous step for each sharp key. Make sure you have a wire connected to each key press and you cover the exposed wire with conductive tape. Also make sure your key press does NOT touch EARTH. In this picture, you can see how we are about to wire the next key and that EARTH is connected to the EARTH tape trace.
Here the wiring is in place and secured with duct tape.
Repeat until all of your sharps are wired. Run the extra long hook up wires to the back headers of your Makey Makey. If you didn't already, make sure to remap the mouse movements on the back right header to key presses. Here is that remap guide if you need it! (Or use our new piano app and no remapping is needed! We remapped two pins to the letters j and k. Then plugged in all the sharps with the extra long hook up wires from the STEM pack. Make sure you label all your wires in case they come unplugged! (To work with our new apps, consider remapping the mouse control on Makey Makey to numbers 1-6.)
This piano works with this Scratch piano coded to be a full octave including sharps/flats! https://scratch.mit.edu/projects/132053565/ But you can also use this piano with our new adjustable piano app and the Makey Max Backpack!
Adjustable Piano AppTo do this, you'll want to remap mouse control inputs to numbers 1-6. When you attach the Makey Max Backpack after remapping, the mouse controls will now be numbers 1-6.
Download your own Remap Worksheet Make sure you have a Makey Makey of 1.4 or higher to use with the Makey Makey Backpack. (You can remap 1.2 or higher and use jumper wires if you do not have the Makey Makey Backpack bundle)
 Place alligator clips the way the illustration shows on the remap page.
 Hold EARTH and move the cursor with the arrow keys. When you get to the mouse header, press click, then navigate to change the top mouse input to the number 1. Repeat until you've changed all of the mouse inputs to the numbers 1-6.
 Make sure to save your settings!Once your Makey Makey mouse controls are remapped, you are ready to attach the Makey Max backpack. Align all pins on the backpack board with the headers on Makey Makey. Gently squeeze the boards together with even pressure, making sure all pins enter the corresponding holes.  Test your inputs on Makey Max with the piano app, or open a document and see if pressing these inputs outputs the numbers 1-6.
 |


| Other Ways to Play! |
|
Hook up all of your keys to match this Scratch piano with full octave including sharps/flats! (Scratch Project link: https://scratch.mit.edu/projects/132053565/) Or create your own piano in Scratch! (Here's a really quick handout that might help!) Consider creating some laminated sheet music so your friends can attempt some simple songs. |
 |
| Extensions |
|
Once you've made your piano, you can start dreaming up other pianos. You could use the ultimate stomp pad guide to create switches for piano keys, or even put a piano on a stairwell. But make sure you hold on to the hand rail! We love the idea of a roll up piano (similar to this roll up maze by Frazer McKay). If you create this piano on yoga mat, you can take it everywhere you go! Make sure to share your remixes over at Instructables or comment below to share your oversized pianos! We love seeing how you #makeymakey a piano! If you liked this guide, you might enjoy these other musical guides: |
|
|


Supplies
- HVAC tape
- Aluminum foil
- Cardboard or Yoga Mat
- Duct tape
- Extra long hook up wire from STEM pack
- Extra long alligator clips from STEM pack
- Optional: Player 2 Backpack